Overcoming the Challenges of Working With a Mobile FinTech API

In this digital age, we are constantly seeing innovative solutions to revolutionize the way we interact with money.
African network provider MTN’s Mobile Money platform stands at the forefront of this evolution. It allows users to perform various financial transactions using their mobile devices, such as sending and receiving money, paying bills, purchasing airtime and data, and saving or borrowing money.
The MTN MoMo API enables developers to seamlessly integrate the many MTN Mobile Money functionalities into applications and systems. From facilitating transactions to enabling digital commerce, its potential is immense.
Even so, the MTN MoMo API has its technical challenges, including security concerns around data breaches and issues with downtime and functionality. Navigating its intricacies can be daunting, and there are areas where clarity and functionality could be enhanced. As a technologist, you can help solve MTN MoMo API issues by contributing to open source, such as projects on GitHub.
In this tutorial, we’ll improve MTN MoMo Open API using Postman as our primary API platform, though you can use any client platform you’re comfortable with. I’ll be conducting tests in the sandbox environment in this guide. If you decide to go live, prepare for a straightforward and self-explanatory process.
Head over to the MTN MoMo developer platform and set up your account to kick things off. Upon registration, you’ll gain access to various products within the MoMo API ecosystem, including collections, disbursements, collection widgets and remittances, designed to tailor functionalities to your application’s needs. Subscribing to these products is essential to obtain the primary and secondary keys necessary for the seamless integration of this service.
Visual representation of the subscribed products.
We’re focusing on the collections product, which facilitates remote payment collection from your service consumers. Although the API endpoints differ, the operational logic remains uniform across all products.
Our first objective is to generate a user and API key for OAuth 2.0 authentication. Whenever Ocp-Apim-Subscription-Key is mentioned, it pertains to the UUID (Universally Unique Identifier ) V4 that we will generate later. Similarly, X-Reference-Id signifies the primary key obtained for the post-product subscription. Although it might seem complex, fear not. We’ll navigate through each step together.
The collections product offers a range of API endpoints that can enhance the functionality of our applications.
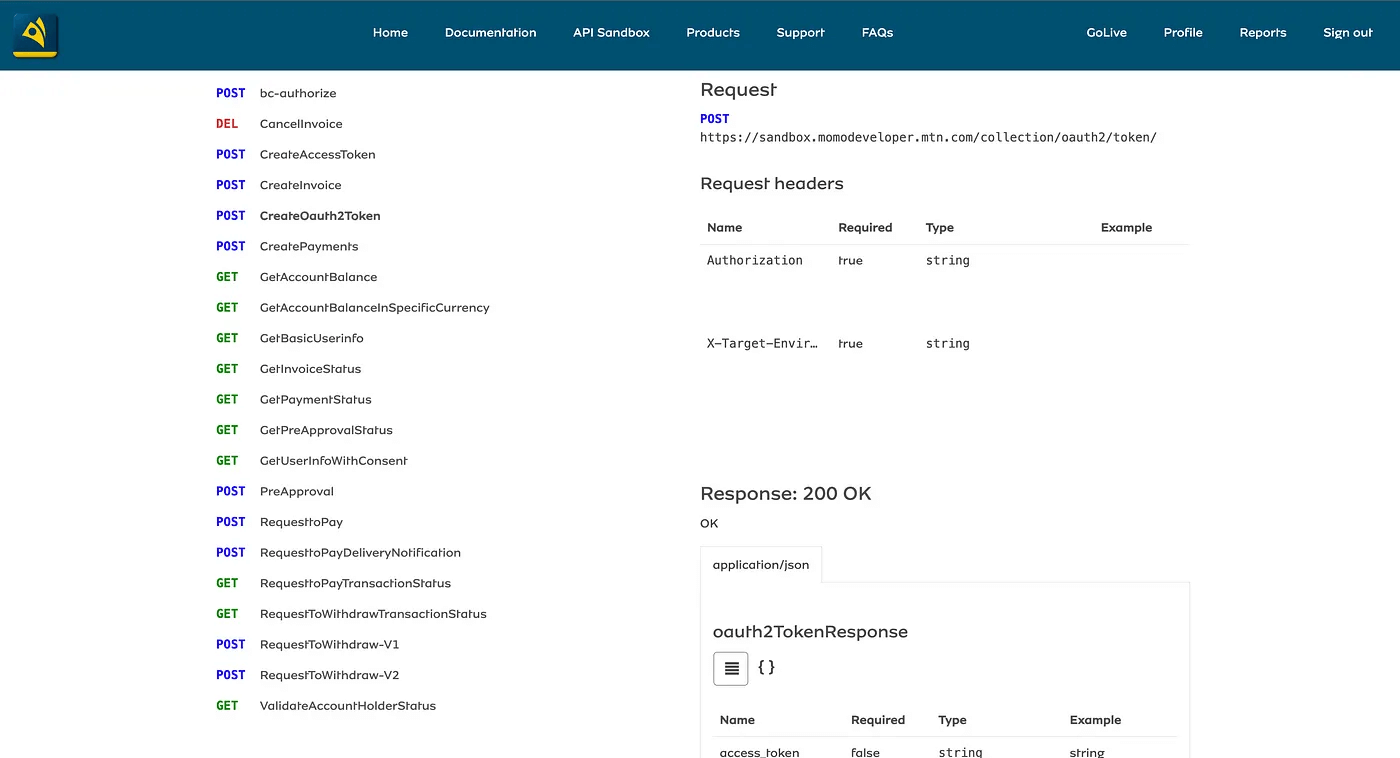
List of endpoints exposed by the collections product.
However, we are unable to use them just yet without creating an API user, which we’ll do next.
Prepare your preferred API platform, like Postman, and access the URL https://sandbox.momodeveloper.mtn.com/v1_0/apiuser to initiate a POST request. Make sure to include the X-Reference-Id and the Ocp-Apim-Subscription-Key in the request headers. The X-Reference-Id corresponds to the UUID V4 you can generate from a free UUID generator website. In contrast, the Ocp-Apim-Subscription-Key represents the primary key acquired after product subscription. Following the documentation, it’s essential to include a callback function in the request body to run upon a successful request execution. For demonstration purposes, a generic callback function will be used. If needed, you can obtain your custom callback function from a free and accessible callback function generator.
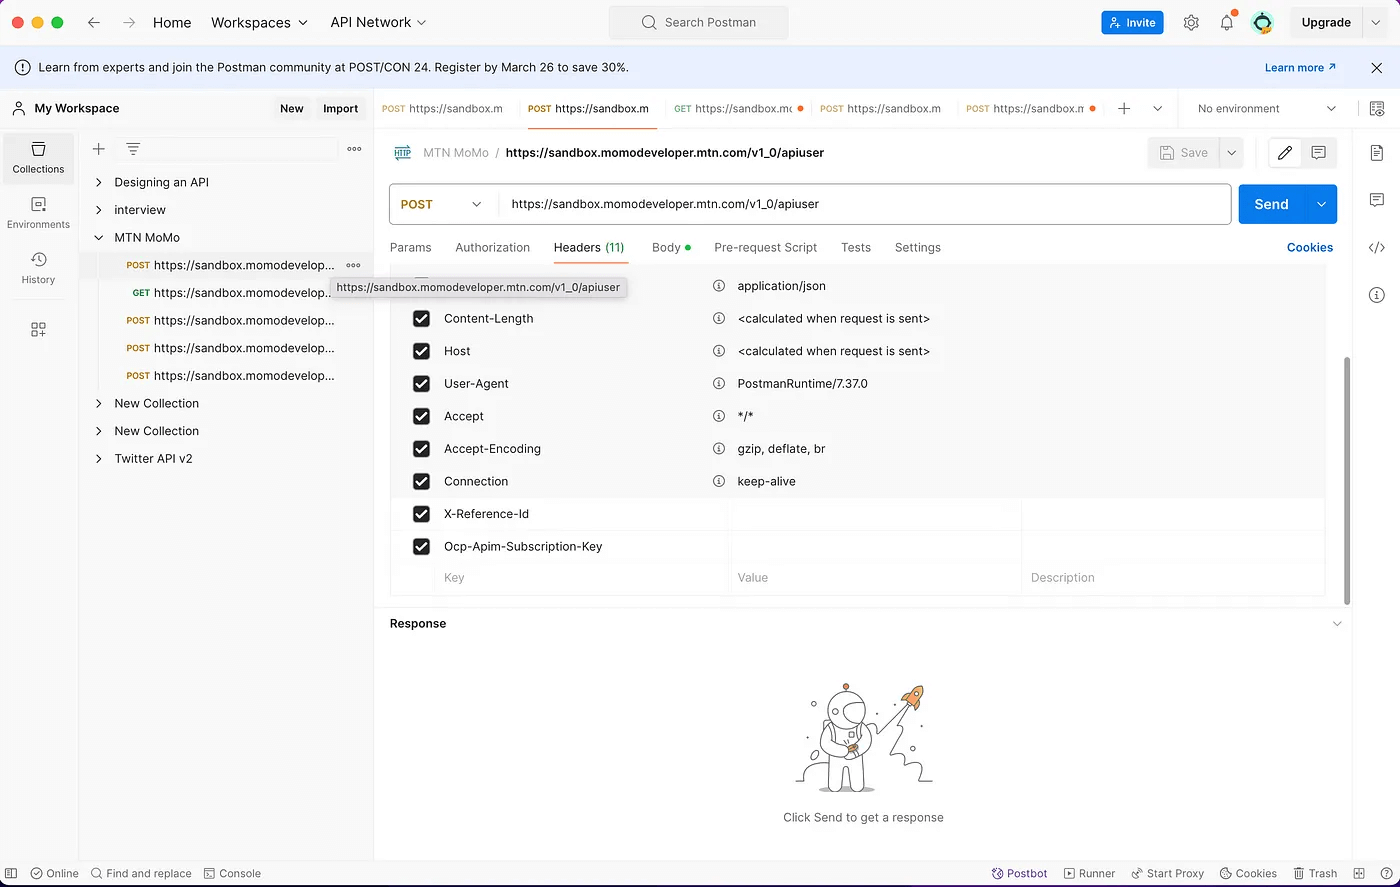
Visual representation of the headers to be included with the API user creation request. (Mine are hidden)
After sending the request, a 201 resource-created status code will confirm the successful creation of an API user. However, you may notice that the response body lacks user information essential for subsequent requests. To acquire this critical data, execute a GET request to the URL https://sandbox.momodeveloper.mtn.com/v1_0/apiuser/{X-Reference-Id}, replacing ‘X-Reference-Id’ with the UUID from user creation. Remember to include the Ocp-Apim-Subscription-Key in the headers for authentication.
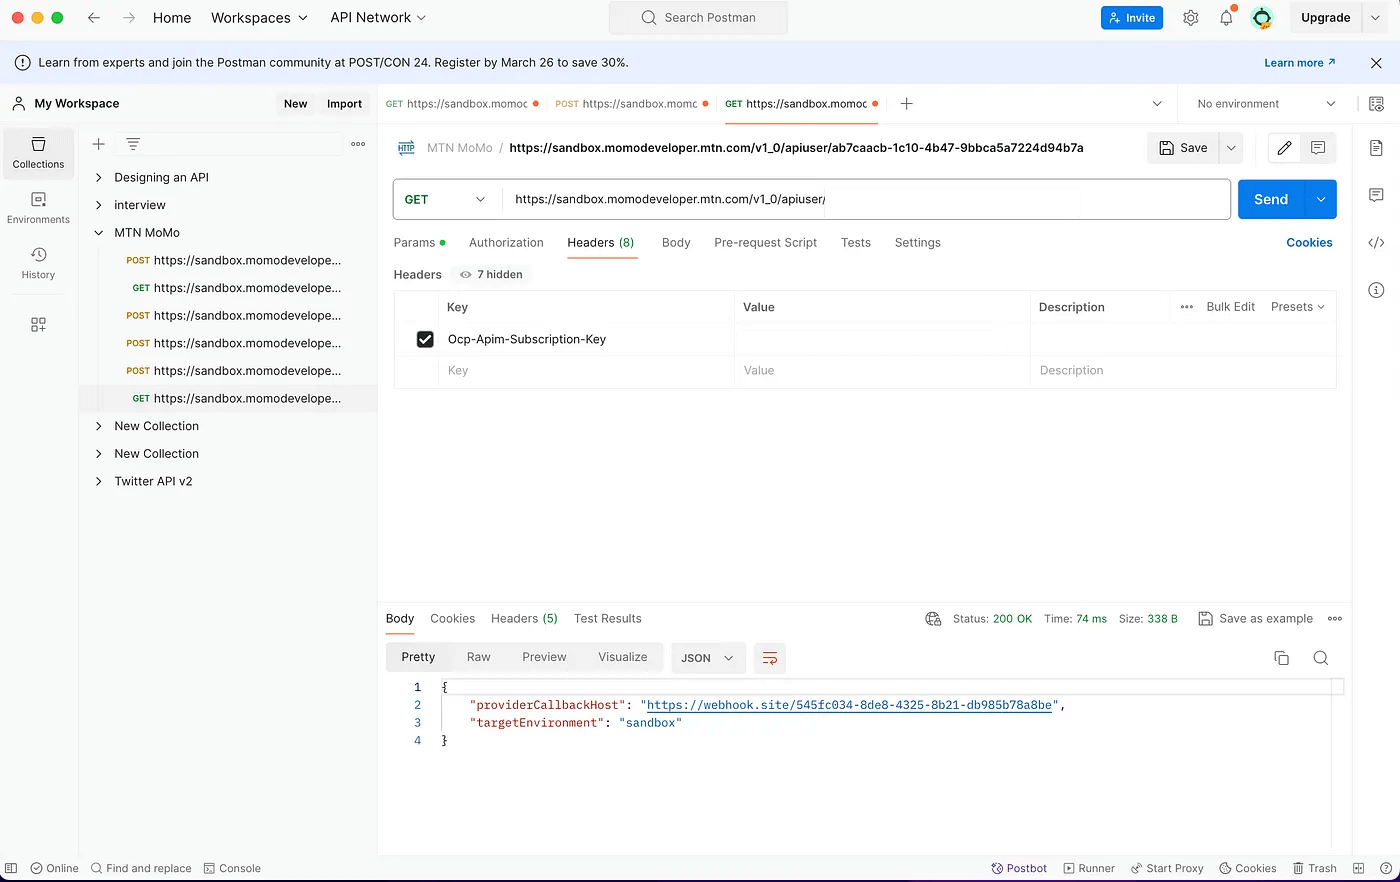
Visual representation of the response body from the “get user information” request.
Having created a new user and retrieved their information, it’s time to dive into the collection’s product features. We’ll need an API key and bearer token for each API request to get started. These essentials act as our access pass, enabling the API to recognize the request source and grant us access to the necessary resources.
To begin, we will generate an API key by making a POST request to the URL https://sandbox.momodeveloper.mtn.com/v1_0/apiuser/{X-Reference-Key}/apikey, replacing “X-Reference-Key” with the UUID. Remember to include the subscription key in the request headers.
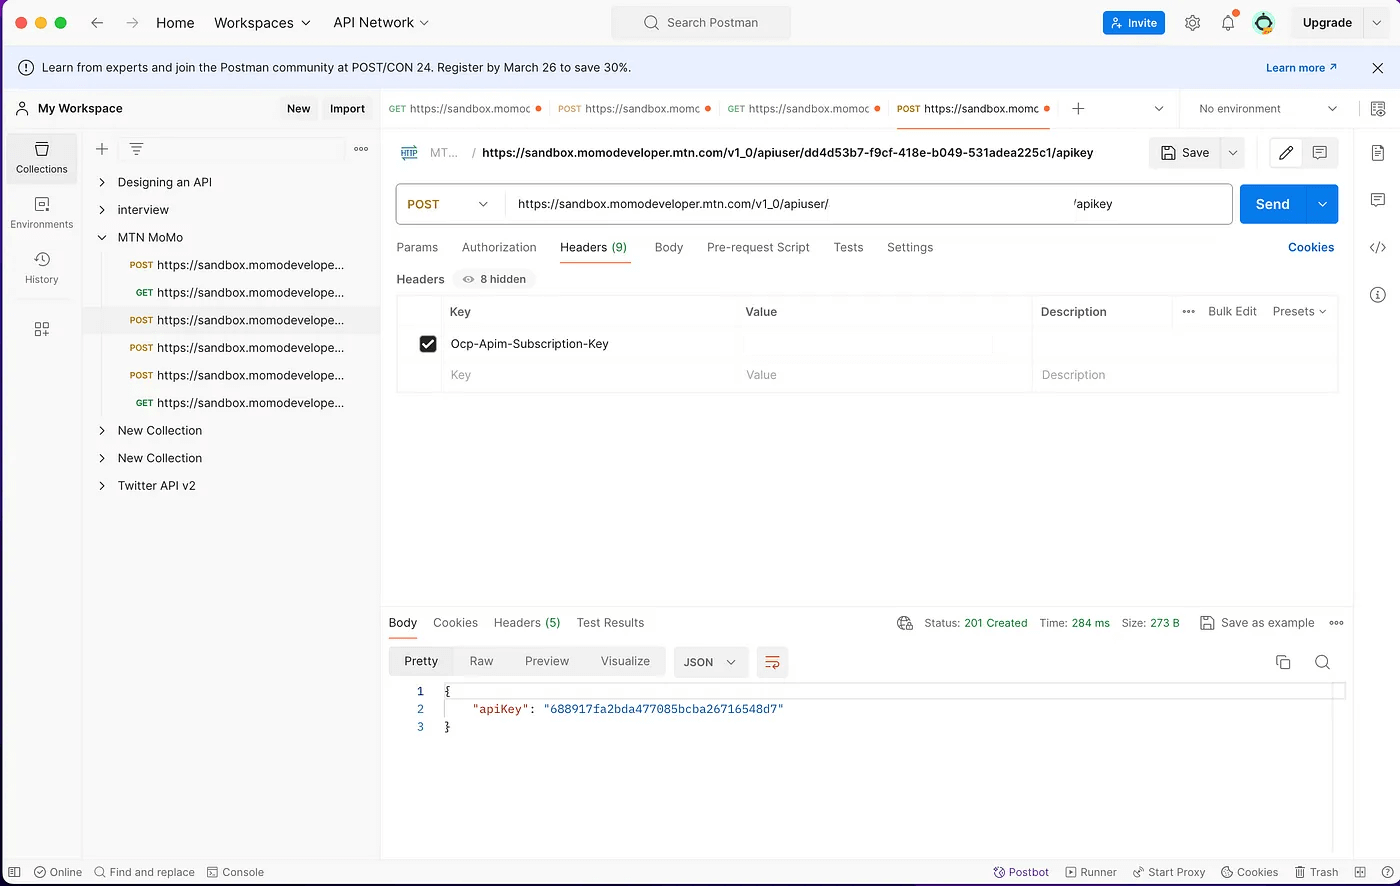
Visual depiction of the API key received in the response.
Next, we’ll create a bearer token to authenticate each request to the various endpoints of the collection product. For this step, we’ll approach things a bit differently. We will initiate a POST request to the URL https://sandbox.momodeveloper.mtn.com/collection/token/, including the subscription key in the headers. Using basic authenication, we’ll set the username as the X-Reference-Id and the recently generated API key as the password.
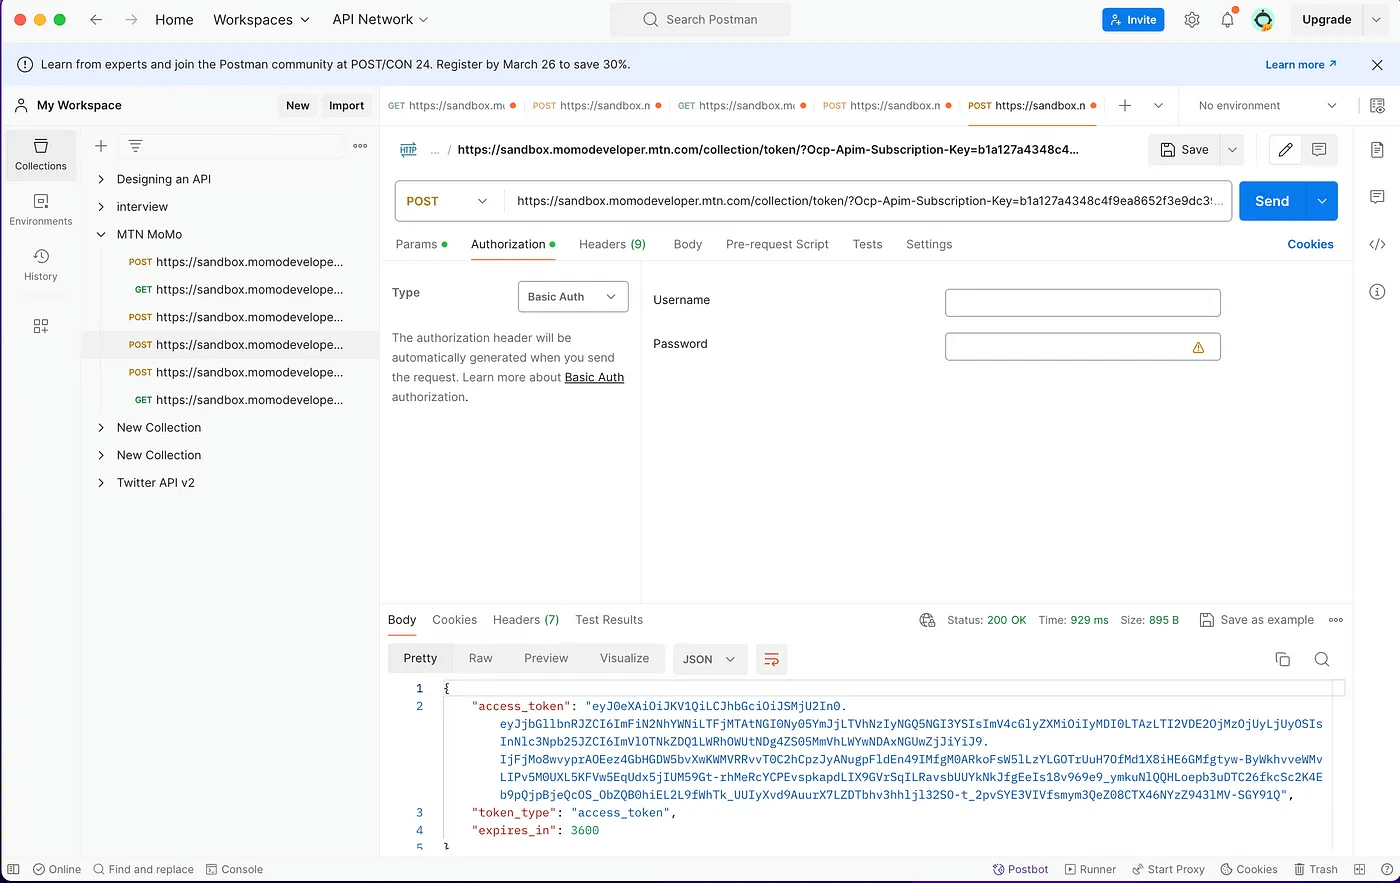
Visual representation of the bearer token returned from the POST request.
We can now use the endpoints of the collections product — specifically the “request to pay” endpoint, though with the information provided, you can use all other endpoints as well. Let’s kick things off by sending a POST request to the URL https://sandbox.momodeveloper.mtn.com/collection/v1_0/requesttopay. This request operates across three distinct states:
1. Approval state: where the consumer provides their PIN, confirming the transaction and marking it as successful.
2. Pending state: where the request awaits approval or rejection by the consumer.
3. Rejection state: where the consumer declines the request.
In the request headers, alongside the standard X-Reference-Id and subscription key, we’ll introduce the target environment retrieved during user information retrieval. Additionally, we’ll update the authorization method for bearer token authentication using the newly acquired bearer token. We’ll include a JSON object with specified properties in the request body. Feel free to customize the values as needed.
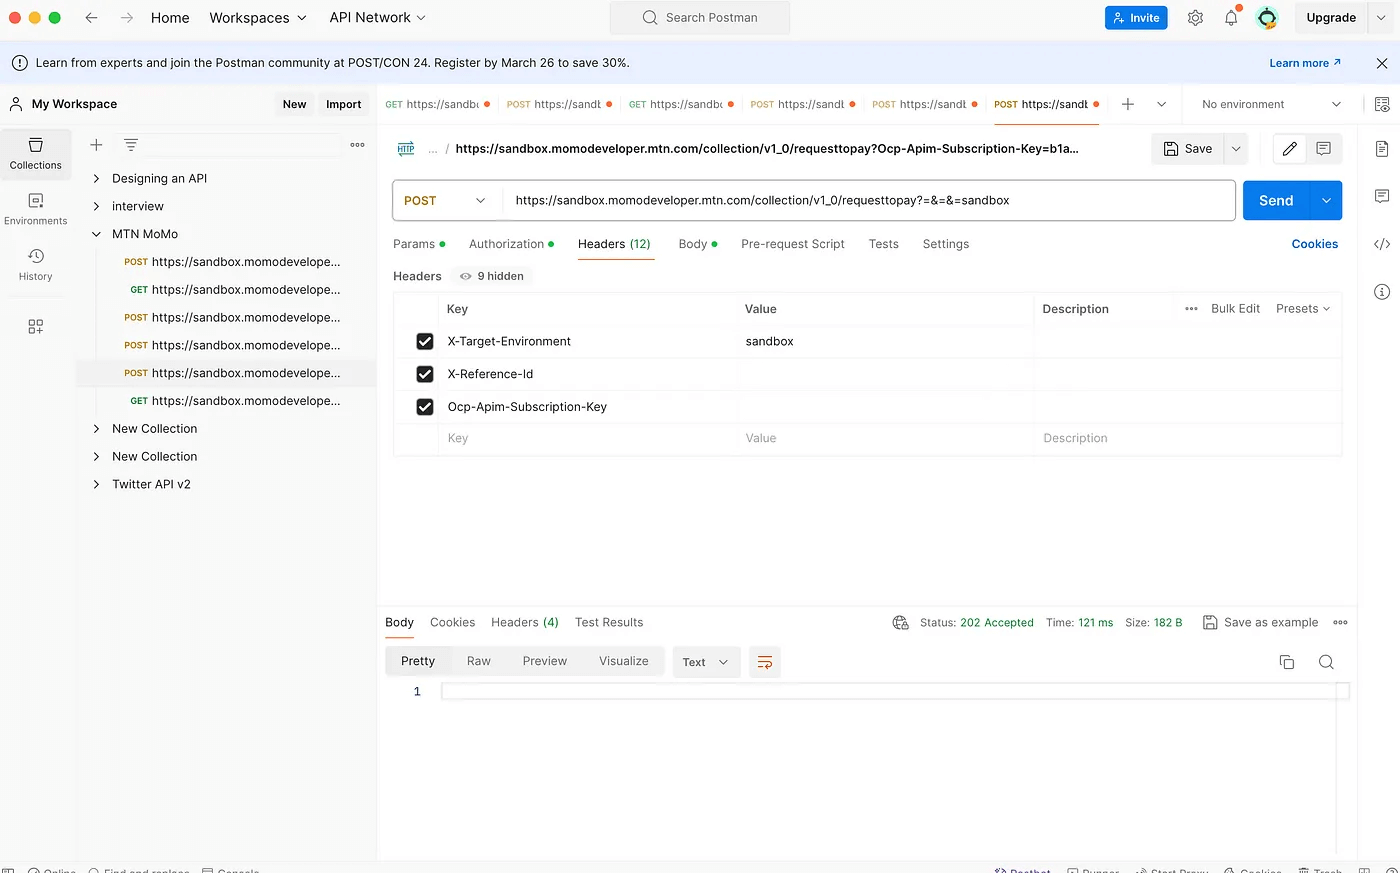
Visual representation of the successful “request to pay” request.
Before wrapping up, let’s briefly explain the properties within the JSON object submitted as the body of the “request to pay” request:
The “amount” signifies the money debited from the consumer’s account, while “currency” denotes the transaction’s currency name. “External Id” serves as a reference for the transaction, aiding in reconciliation and inclusion in transaction history reports. Within the nested “payer” object, “partyIdType” can be “MSISDN” for a validated phone number or “EMAIL” for a verified email address. The “partyId” represents the consumer’s phone number. The “payerMessage” field contains the message for the payer’s transaction history, and finally, “payeeNote” includes a note for the payee’s transaction history. Customize these properties as needed for your transactions.
In the dynamic world of digital finance, the MTN MoMo Open API stands out as a game-changer for those ready to redefine financial services.
Despite the potential of the MTN Mobile Money platform and its API, we’ve identified technical hurdles that need tackling, from complex documentation to enhancing functionality. It’s up to us, the tech community, to drive these improvements forward and shape the future of FinTech through open source collaboration.
Read Andela’s ultimate guide to hiring the best FinTech engineers to apply technological advancements to improve current and create new financial products and services.
YOUTUBE.COM/THENEWSTACK
Tech moves fast, don’t miss an episode. Subscribe to our YouTube
channel to stream all our podcasts, interviews, demos, and more.


